• File
    • Import file(Ctrl+O)
    • Clear all(Ctrl+E)
    • Save to My Designs(Ctrl+S)
    • Save as file(Ctrl+Shift+S)
  • Designs

      My designs

      • All Categories
      • Category #1
      • New Category
    • Print

        Print design

    • Help
      • Quick help

      • Thank you for using Kis Design Studio! Please use this guide for any help you might need, otherwise email us at info@kiscards.co.nz

        NFC/QR Encode Information

        The information you wish to encode on the card, can be entered in the Product tab. Click the Product tab on the left toolbar and scroll down to the field list. From here you can enter each individual contact field. Not all fields are required, only the ones you wish to encode in the card.

        The back QR code

        Once we receive your order, we will generate a custom QR code based on your encoded information.
      • Thank you for using Kis Design Studio! Please use this guide for any help you might need, otherwise email us at info@kiscards.co.nz

        Changing the color of your card

        Click the Product tab on the left toolbar and select a color from the 25 choices. The back of the card will remain white.

        Move, rotate and resize objects

        Once you select your object (Image, text, shape etc), you can use the 4 buttons on the corner of the object. To move an object, click and drag the object around.

        Adding Images

        Simply click the Images tab on the left toolbar and either use a previously uploaded image or upload an image by using the Click or drop images here button.

        Adding Text

        Click the Text tab on the left toolbar and select from a range of fonts. Once you select your font, it will automatically drop the text onto your card. Not enough font options? Click the Load more fonts button at the bottom of the page to access 100's of more fonts.

        Changing the color of your text

        Click on the desired text you wish to change the color of. Once selected select the paint bucket icon on the top toolbar. Choose from a range of pre selected colors or use a custom colour by clicking on the HEX code (#ffffff).

        Changing text properties

        Once you have selected your text object, you can view a range of options in the top toolbar including: Size, Effects, Colour, Position, Bold, Underline, etc.

        Adding Shapes

        Click the Shapes tab on the left toolbar and select from a range of shapes. Click on ant shape and watch it automatically drop onto your card.

        Changing the color of shapes

        Click on the shape you wish to change the color of. Click on the top left circle, which by default is black. Choose from a range of pre selected colors or use a custom colour by clicking on the HEX code (#ffffff).
      • Thank you for using Kis Design Studio! Please use this guide for any help you might need, otherwise email us at info@kiscards.co.nz

        Saving my design

        You can save your design and come back to it later if you wish. Click the Save to MyDesigns button which will appear once you have added an object onto the card. Then click New Design and your design is saved. Note: Your designs are saved to your local browser.

        Use my saved design

        You can revisit and edit a previously saved design. Click the Designs tab on the top toolbar and select a previously saved design by clicking the Use This tab.

      • Thank you for using Kis Design Studio! Please use this guide for any help you might need, otherwise email us at info@kiscards.co.nz

        Once finished, please make sure you have selected your desired quantity, base color and have completed any encoding information, including agreeing to the terms. Then click the Add to cart button in the top right corner. From here you can either create a new design or checkout.
      • Copyright 2024 | KIS Cards Limited. For all inquiries please email us at: info@kiscards.co.nz

        Powered by Lumise version 2.0.2

    • Shop
    • Undo
    • Redo
    • Design
    • Product
    • Images
    • Text
    • Shapes
    • Layers
      More
    Click or drop images here

      Click or drag to add text

        • Start designing by adding objects from the left side
        • All selected objects are grouped | Ungroup?
        • Group objects Group the position of selected objects
          • Fill options

            Save this color

          • Options
            • Automatically align the position of <br>the active object with other objects
            • ON: Keep all current objects and append the template into<br> OFF: Clear all objects before installing the template
            • Replace the selected image object instead of creating a new one
          • Replace image
          • Crop
          • Mask
            • Select mask layer

          • Remove background
            • Remove background

            • Deep:

            • Mode:

          • Filters
            • Filters

              • Original
              • B&W
              • Satya
              • Doris
              • Sanna
              • Vintage
              • Gordon
              • Carl
              • Shaan
              • Tonny
              • Peter
              • Greg
              • Josh
              • Karen
              • Melissa
              • Salomon
              • Sophia
              • Adrian
              • Roxy
              • Singe
              • Borg
              • Ventura
              • Andy
              • Vivid
              • Purple
              • Thresh
              • Aqua
              • Edge wood
              • Aladin
              • Amber
              • Anne
              • Doug
              • Earl
              • Kevin
              • Polak
              • Stan

            • Brightness:

            • Saturation:

            • Contrast:

          • Clear Filters
          • Click then drag the mouse to start drawing. Ctrl+Z = undo, Ctrl+Shift+Z = redo
          • QRCode text
          • Fill options
            • Fill options

              Save this color

              • Transparent:

              • Stroke width:

              • Stroke color:

            • Ungroup position
            • Arrange layers
            • Position
              • Object position

                Lock object position:

              • Center vertical
              • Top left
              • Top center
              • Top right
              • Center Horizontal
              • Middle left
              • Middle center
              • Middle right
              • Press &leftarrow; &uparrow; &rightarrow; &downarrow; to move 1 px, <br>Hit simultaneously SHIFT key to move 10px
              • Bottom left
              • Bottom center
              • Bottom right
            • Transforms
              • Rotate:

              • Skew X:

              • Skew Y:

              • Flip X:
                Flip Y:

                Free transform by press SHIFT+⤡

            • Font family
            • Edit text
              • Edit text

              • Font size:

              • Letter spacing

              • Line height

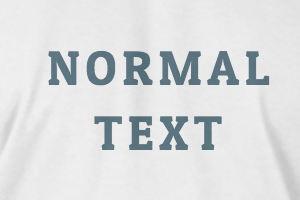
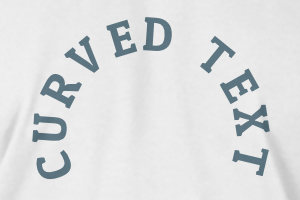
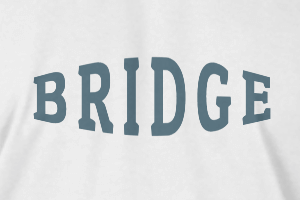
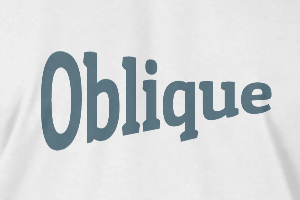
            • Text Effects
              • Text effects

              • Radius

              • Spacing

              • Curve

              • Height

              • Offset

              • Trident

            • Text align
            • Uppercase / Lowercase
            • Font weight bold
            • Text style italic
            • Text underline
            Scroll to zoom